
Get On The List
Get the latest Men's Style Advice, Evergreen Guides, Shopping Tips, and Exclusive Deals From Today's Top Brands.
We independently evaluate all recommended products and services. Any products or services put forward appear in no particular order. if you click on links we provide, we may receive compensation.

I’ve never built a watch before, but I have a modded watch from a good friend of mine who built a watch for me from the specs and parts I wanted in that specific watch. But today, I’m going to attempt to build my very first watch from our good friends over at Namoki Mods.
So, thanks so much for sending this over. What you’re about to read is a real-time play-by-play of my DIY GMT Watch Build. Strap in (pun intended)!

We are going to build a GMT today. So, it looks like we have our watch tools and parts.
I’m familiar with this cuz I have a very similar watch-making toolset that looks very similar to this. So, let’s just get into it.

All right, we have our movement right here, our dial here, and the case itself, so actually, I’m going to leave this out just so we have it ready, and there is our bezel.
Now, we just have to put this all together and hope we don’t mess anything up.

Step one is bezel installation. It’s like putting together Ikea stuff, right? Okay, I already screwed this up. This is going to require a lot more concentration than I thought.
All right, let’s align this bezel as best as we can. Okay, that’s good for now. It’s a 120-click bezel, so it’s a little forgiving. We can kind of correct our mistakes, which I’m pretty sure I did.
All right, let’s move on to step two, trim. This step kind of scares me the most. It doesn’t look like they gave us some type of trim tool here. It looks like it wants us to take the movement out and the dial.

All right, let’s get this dial carefully out of its case. Okay, so it looks like they don’t really give us this tool here. Basically, we just have to cut the right feet off.
I know I should be using finger cots, but it’s okay, it’s my first build. If it’s bad, it’s a learning experience, right?

How do we trim this? There’s no way that you can trim it with the pry tool they included. I heard some people saying that what they do is they bend it, but I’m not sure if they bend it with these tweezers just to basically – let’s see.
Okay, hey, I think that worked! All right, let’s just do the same thing with the other feet. Look at that, it’s great!

All right, so step three – oh boy, this one makes me a little bit nervous. I really don’t want to bend the hands, but I have a feeling that because it is my first time, I just might.
So, let’s see how this works. So it says to rotate the crown clockwise in time setting mode and stop when the date wheel rolls to the next day.

Okay, so basically I’m just turning this until it turns to the first. Press the GMT hand loosely into position – you only secure it after checking alignment. Okay, all right, here we go. First hand GMT, luckily this guy is a really big fat boy.
I mean clearly, like me, like a lot of beginners, you don’t know what tools to use and what is what cuz I thought you might have to use a pad thing to see everything, but that’s not the case. Align this guy, let’s give it a nice little press.
I think I got it. Lift it up a little bit – it’s not 100% aligned. We also bent the hands and we’re not even on the hard hands yet. This is where things will get a little bit harder as the hands we’re dealing with are much finer.

Time to place the hour hands. Oh, thank goodness everything aligns. Almost there, almost there. Okay, so it looks like we’re going to have to take out the stem while everything is in there.
We don’t have the right holder for it – we’ll work with what we have. You know what, I’m going to ask my wife to help.
Anyways, we got out the stem. Apparently, you’re supposed to – it doesn’t say in the instructions, but it says to release the stem once again, but it doesn’t tell you that you’re supposed to release it while it’s in the winding position—a very big thing to know.

Now it says to install the back movement back into the case, aligning the internal crown tube with the stem opening onto the movement. I feel like I’m growing a zit on the bottom of my chin just doing this cuz I don’t want to mess things up here.
Okay, I guess we’re going to just drop this guy in here. Nope, it’s not fully seated. In the beginning, I used the wrong tool. Okay, I think we’re all seated now, which is great.

Next up in my DIY GMT Watch Build, we’re ready to insert the crown stem into the crown and twist it clockwise to tighten. Pop it in here. It says here to size the GMT hand.
I feel like I’m missing something here. I feel like the stem is too long.

So it’s weird, right? Cuz it says to insert crown stem, twist clockwise to tighten. It has a nice springy to it, however, what’s going on here? You know what, I don’t know how I did it, but it ended up working.
So I think that literally took 30 minutes just trying to – like I said, I’m clearly not built for this, but we somehow got the stem and the crown working. It’s screwed down, everything’s perfect.

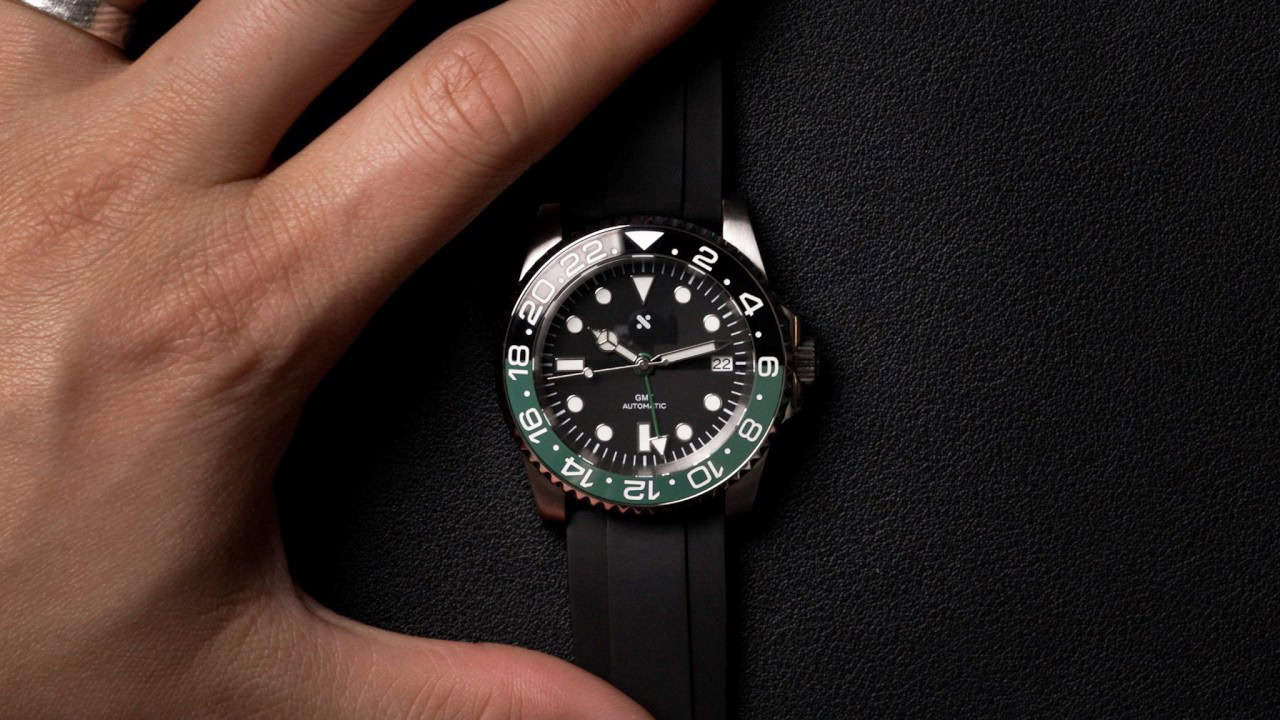
Finally, after all that noobness, let’s install this gasket. Now, this part is the easiest part of this entire mod; it’s just tightening things down. Awesome! Well, there it is. It’s done!

I might have to go back to fix the hands, but right now, I’m just happy that I’ve spent the last almost two and a half hours putting this watch together.
The hardest part clearly was the hands, especially that second hand and just getting everything aligned, but I have to say it’s looking good for the most part.
That’s the Namoki mod right there. They also included rubber straps, which, I mean, I’m not really a fan of, I will probably swap them out. Changing straps is the extent of my knowledge. Oh, luckily, there’s a great quick release. That’s what you get with this DIY watchmaking kit.

People are saying that they wish this was a little bit more clear, and I totally agree with that as well. I think I was just a little confused at some steps on what tools exactly to use, and especially placing in that movement.

I think this is a great kit for people just getting into it who know a little thing or two about modding. Maybe they watch a lot of modding videos – that really helps a lot.
Personally, I don’t do that, but to my fellow modder friends out there, kudos to you guys because it’s quite a bit of work. But it was a good experience to get my hands dirty and put together a watch.
So, I hope you guys enjoyed this DIY GMT Watch Build. Maybe I’ll get better the second time around. So until next time, I’m Chris from Clicky Bezel, and I hope to see you soon!

From a young age, I was hooked on watches. My dad and uncle were both collectors, and I couldn’t resist the allure of their timepieces. But it wasn’t until I stumbled upon a Casio digital calculator watch in college that I truly fell in love. (I originally bought the watch to complete my Back to the Future costume for an 80’s-themed party)
It wasn’t until the release of the Swatch Moonswatch watches that Clicky Bezel came to fruition. My wife (bless her heart) had been bugging me for years to start a YouTube channel, and I finally caved in with my first video covering my experience camping over 16 hours for the hyped-up Moonswatches.
In a relatively short time, I’ve been lucky enough to connect and collaborate with some big players in the industry, including Nomos Glashütte, Jomashop, Minase, and now Fashionbeans. To learn more about my passion, find my content here on fashionbeans.com, follow my Youtube page: https://www.youtube.com/c/ClickyBezel or visit my website at: https://clickybezel.com/

We independently evaluate all recommended products and services. Any products or services put forward appear in no particular order. if you click on links we provide, we may receive compensation.
I’ve never built a watch before, but I have a modded watch from a good friend of mine who built a watch for me from the specs and parts I wanted in that specific watch. But today, I’m going to attempt to build my very first watch from our good friends over at Namoki Mods.
So, thanks so much for sending this over. What you’re about to read is a real-time play-by-play of my DIY GMT Watch Build. Strap in (pun intended)!
We are going to build a GMT today. So, it looks like we have our watch tools and parts.
I’m familiar with this cuz I have a very similar watch-making toolset that looks very similar to this. So, let’s just get into it.
All right, we have our movement right here, our dial here, and the case itself, so actually, I’m going to leave this out just so we have it ready, and there is our bezel.
Now, we just have to put this all together and hope we don’t mess anything up.
Step one is bezel installation. It’s like putting together Ikea stuff, right? Okay, I already screwed this up. This is going to require a lot more concentration than I thought.
All right, let’s align this bezel as best as we can. Okay, that’s good for now. It’s a 120-click bezel, so it’s a little forgiving. We can kind of correct our mistakes, which I’m pretty sure I did.
All right, let’s move on to step two, trim. This step kind of scares me the most. It doesn’t look like they gave us some type of trim tool here. It looks like it wants us to take the movement out and the dial.
All right, let’s get this dial carefully out of its case. Okay, so it looks like they don’t really give us this tool here. Basically, we just have to cut the right feet off.
I know I should be using finger cots, but it’s okay, it’s my first build. If it’s bad, it’s a learning experience, right?
How do we trim this? There’s no way that you can trim it with the pry tool they included. I heard some people saying that what they do is they bend it, but I’m not sure if they bend it with these tweezers just to basically – let’s see.
Okay, hey, I think that worked! All right, let’s just do the same thing with the other feet. Look at that, it’s great!
All right, so step three – oh boy, this one makes me a little bit nervous. I really don’t want to bend the hands, but I have a feeling that because it is my first time, I just might.
So, let’s see how this works. So it says to rotate the crown clockwise in time setting mode and stop when the date wheel rolls to the next day.
Okay, so basically I’m just turning this until it turns to the first. Press the GMT hand loosely into position – you only secure it after checking alignment. Okay, all right, here we go. First hand GMT, luckily this guy is a really big fat boy.
I mean clearly, like me, like a lot of beginners, you don’t know what tools to use and what is what cuz I thought you might have to use a pad thing to see everything, but that’s not the case. Align this guy, let’s give it a nice little press.
I think I got it. Lift it up a little bit – it’s not 100% aligned. We also bent the hands and we’re not even on the hard hands yet. This is where things will get a little bit harder as the hands we’re dealing with are much finer.
Time to place the hour hands. Oh, thank goodness everything aligns. Almost there, almost there. Okay, so it looks like we’re going to have to take out the stem while everything is in there.
We don’t have the right holder for it – we’ll work with what we have. You know what, I’m going to ask my wife to help.
Anyways, we got out the stem. Apparently, you’re supposed to – it doesn’t say in the instructions, but it says to release the stem once again, but it doesn’t tell you that you’re supposed to release it while it’s in the winding position—a very big thing to know.
Now it says to install the back movement back into the case, aligning the internal crown tube with the stem opening onto the movement. I feel like I’m growing a zit on the bottom of my chin just doing this cuz I don’t want to mess things up here.
Okay, I guess we’re going to just drop this guy in here. Nope, it’s not fully seated. In the beginning, I used the wrong tool. Okay, I think we’re all seated now, which is great.
Next up in my DIY GMT Watch Build, we’re ready to insert the crown stem into the crown and twist it clockwise to tighten. Pop it in here. It says here to size the GMT hand.
I feel like I’m missing something here. I feel like the stem is too long.
So it’s weird, right? Cuz it says to insert crown stem, twist clockwise to tighten. It has a nice springy to it, however, what’s going on here? You know what, I don’t know how I did it, but it ended up working.
So I think that literally took 30 minutes just trying to – like I said, I’m clearly not built for this, but we somehow got the stem and the crown working. It’s screwed down, everything’s perfect.
Finally, after all that noobness, let’s install this gasket. Now, this part is the easiest part of this entire mod; it’s just tightening things down. Awesome! Well, there it is. It’s done!
I might have to go back to fix the hands, but right now, I’m just happy that I’ve spent the last almost two and a half hours putting this watch together.
The hardest part clearly was the hands, especially that second hand and just getting everything aligned, but I have to say it’s looking good for the most part.
That’s the Namoki mod right there. They also included rubber straps, which, I mean, I’m not really a fan of, I will probably swap them out. Changing straps is the extent of my knowledge. Oh, luckily, there’s a great quick release. That’s what you get with this DIY watchmaking kit.
People are saying that they wish this was a little bit more clear, and I totally agree with that as well. I think I was just a little confused at some steps on what tools exactly to use, and especially placing in that movement.
I think this is a great kit for people just getting into it who know a little thing or two about modding. Maybe they watch a lot of modding videos – that really helps a lot.
Personally, I don’t do that, but to my fellow modder friends out there, kudos to you guys because it’s quite a bit of work. But it was a good experience to get my hands dirty and put together a watch.
So, I hope you guys enjoyed this DIY GMT Watch Build. Maybe I’ll get better the second time around. So until next time, I’m Chris from Clicky Bezel, and I hope to see you soon!
From a young age, I was hooked on watches. My dad and uncle were both collectors, and I couldn’t resist the allure of their timepieces. But it wasn’t until I stumbled upon a Casio digital calculator watch in college that I truly fell in love. (I originally bought the watch to complete my Back to the Future costume for an 80’s-themed party)
It wasn’t until the release of the Swatch Moonswatch watches that Clicky Bezel came to fruition. My wife (bless her heart) had been bugging me for years to start a YouTube channel, and I finally caved in with my first video covering my experience camping over 16 hours for the hyped-up Moonswatches.
In a relatively short time, I’ve been lucky enough to connect and collaborate with some big players in the industry, including Nomos Glashütte, Jomashop, Minase, and now Fashionbeans. To learn more about my passion, find my content here on fashionbeans.com, follow my Youtube page: https://www.youtube.com/c/ClickyBezel or visit my website at: https://clickybezel.com/

Get the latest Men's Style Advice, Evergreen Guides, Shopping Tips, and Exclusive Deals From Today's Top Brands.
We respect your privacy. We won't spam you.